Biryani Recipe: The Ultimate Guide to Making Restaurant-Style Biryani at Home
Servings: 6-8 people
Prep Time: 30 minutes
Cook Time: 1 hour 15 minutes
Total Time: 1 hour 45 minutes
So you want to make biryani at home? Good choice. Nothing beats the aroma of perfectly layered rice and meat wafting through your kitchen. Trust me, once you nail this, you’ll never look at takeout biryani the same way.
Here’s the thing about biryani—it seems intimidating, but it’s actually pretty straightforward. You just need patience and the right technique. I’ve been making this for years, and honestly, it’s become my go-to recipe when I want to impress someone without breaking a sweat.
What Makes Biryani So Special?
Let me tell you why biryani isn’t just another rice dish. This isn’t your everyday chicken and rice situation. Biryani is art, science, and pure magic combined.
The layering technique is where the magic happens. You cook rice and meat separately, then stack them like you’re building flavor skyscrapers. Each layer gets its own love—ghee, saffron milk, fried onions.
Think about it—when was the last time you had food that made you close your eyes and just enjoy the moment? That’s what good biryani does. Whether you’re making Hyderabadi Biryani or trying out a Biryani Recipe Vegetarian version, the technique stays similar.
The beauty of biriyani cooking is in the details. The right spices. The perfect rice grain. That golden-brown crispy bottom layer we call tahdig. IMO, that’s the best part 🙂
Ingredients You’ll Need
For the Rice
- 2 cups Basmati rice
- 4 cups water
- 2 bay leaves
- 4 green cardamom pods
- 4 cloves
- 1 cinnamon stick (2-inch piece)
- 1 tablespoon salt
For the Chicken Marinade
- 1 kg chicken (cut into pieces)
- 1 cup plain yogurt
- 2 tablespoons ginger-garlic paste
- 1 teaspoon red chili powder
- 1/2 teaspoon turmeric powder
- 1 teaspoon garam masala
- 2 tablespoons lemon juice
- Salt to taste
For the Biryani Layers
- 3 large onions (thinly sliced)
- 4 tablespoons ghee (clarified butter)
- 1/2 cup fresh mint leaves
- 1/2 cup fresh coriander leaves
- 4 green chilies (slit)
- 1/4 cup milk
- A pinch of saffron strands
- 1/4 teaspoon orange food color (optional)
Whole Spices for Tempering
- 2 bay leaves
- 4 green cardamom pods
- 4 cloves
- 1 black cardamom
- 1-inch cinnamon stick
- 1 star anise
Preparing Your Ingredients
Getting the Rice Ready
First things first—wash that rice. I mean really wash it. Rinse the basmati rice at least 3-4 times until the water runs clear. This removes excess starch and keeps your rice from getting mushy.
Soak the rice in cold water for 30 minutes. This step is crucial for long, separate grains. Skip this and you’ll get clumpy rice. Nobody wants that in their Indian rice recipes.
While the rice soaks, get everything else ready. Slice those onions thin. Chop the herbs. Prep your spices. Organization is key when you’re making easy biryani.
Marinating the Chicken
Mix yogurt, ginger-garlic paste, spices, lemon juice, and salt in a large bowl. Add the chicken pieces and coat them well. Every piece should be covered in that gorgeous marinade.
Let it sit for at least 30 minutes. If you have time, marinate it for 2-3 hours in the fridge. The longer it sits, the more flavor you get. This works for any chicken biryani recipe you’re trying.
The yogurt tenderizes the meat while the spices work their magic. You’ll notice the chicken turning slightly orange from the turmeric. That’s exactly what you want.
Making the Perfect Biryani
Step 1: Frying the Onions
Heat ghee in a heavy-bottomed pot. Add those thinly sliced onions. This is where patience comes in. You want them golden brown, crispy, and caramelized.
Stir occasionally but don’t rush it. This takes about 15-20 minutes on medium heat. Once they’re crispy and brown, remove half and set them aside. They’re your topping.
The remaining onions stay in the pot. They’ll add flavor to the chicken. FYI, properly fried onions are the secret weapon in any biryani aesthetic you’re going for.
Step 2: Cooking the Chicken
Add whole spices to the pot with the remaining onions. Let them crackle for 30 seconds. The aroma will hit you immediately.
Toss in the marinated chicken. Cook on high heat for 5 minutes, stirring frequently. The chicken should start releasing its juices.
Lower the heat to medium. Add half the mint and coriander leaves. Cover and cook for 15-20 minutes until the chicken is 80% done. We’re not fully cooking it yet.
The chicken should be tender but still have a slight bite. It’ll finish cooking during the dum process. This technique works whether you’re making food biryani for a crowd or meal prepping.
Step 3: Parboiling the Rice
While the chicken cooks, boil water in a large pot. Add salt, bay leaves, cardamom, cloves, and cinnamon. The water should taste slightly salty—like the ocean.
Drain the soaked rice and add it to the boiling water. Cook for exactly 5-6 minutes. The rice should be 70% cooked—soft outside but with a slight bite in the center.
Drain immediately. Don’t let it sit in hot water or you’ll end up with overcooked mush. Quick drainage is the difference between good and great biryani.
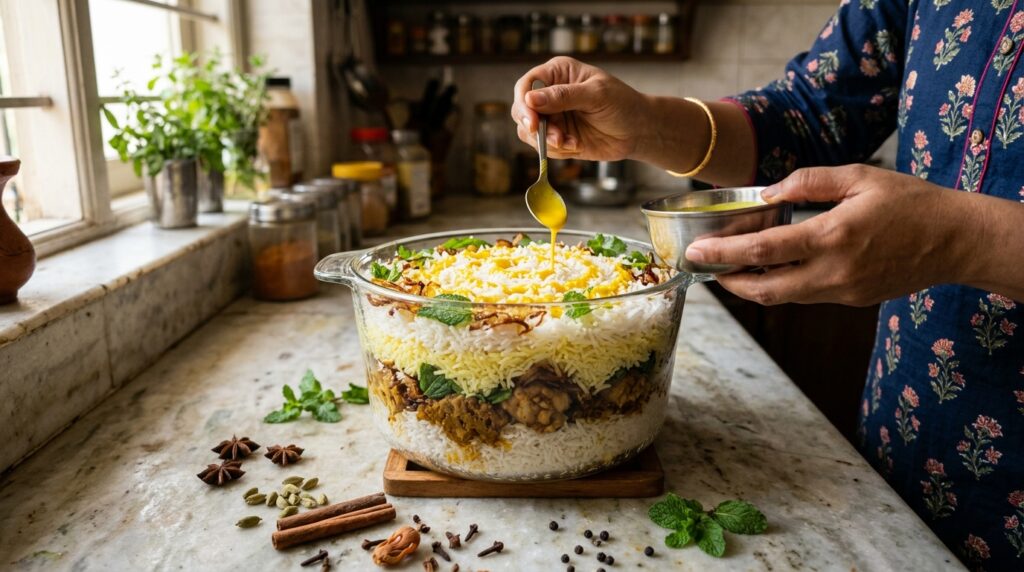
Step 4: The Layering Magic
Here’s where biriyani cooking becomes an art form. Spread the partially cooked chicken evenly at the bottom of your pot. Make it level.
Layer the parboiled rice on top. Spread it gently—don’t press down. You want it fluffy, not compact.
Sprinkle the remaining mint and coriander leaves. Add the reserved fried onions. Drizzle ghee all over the rice. Don’t be shy with it.
Mix saffron strands in warm milk. Add food color if you want that classic briyani image look. Drizzle this over the rice in a pattern. Some people make circles. I just go random.
Step 5: The Dum Process
This is the secret to restaurant-quality biryani. Cover the pot with aluminum foil first, then put the lid on tight. You want zero steam escaping.
Place the pot on high heat for 3-4 minutes. You’ll hear it sizzling. Then reduce to the lowest heat possible.
Let it cook for 30-35 minutes. Don’t open the lid. I know you’ll be tempted. Don’t do it. This slow cooking on low heat is what creates those distinct layers.
Some people place the pot on a tawa (griddle) to prevent bottom burning. If you’re worried about burning, go for it. Better safe than sorry.
Step 6: The Grand Reveal
Turn off the heat. Let the pot sit covered for 5 minutes. This resting time allows the flavors to settle and the rice to firm up slightly.
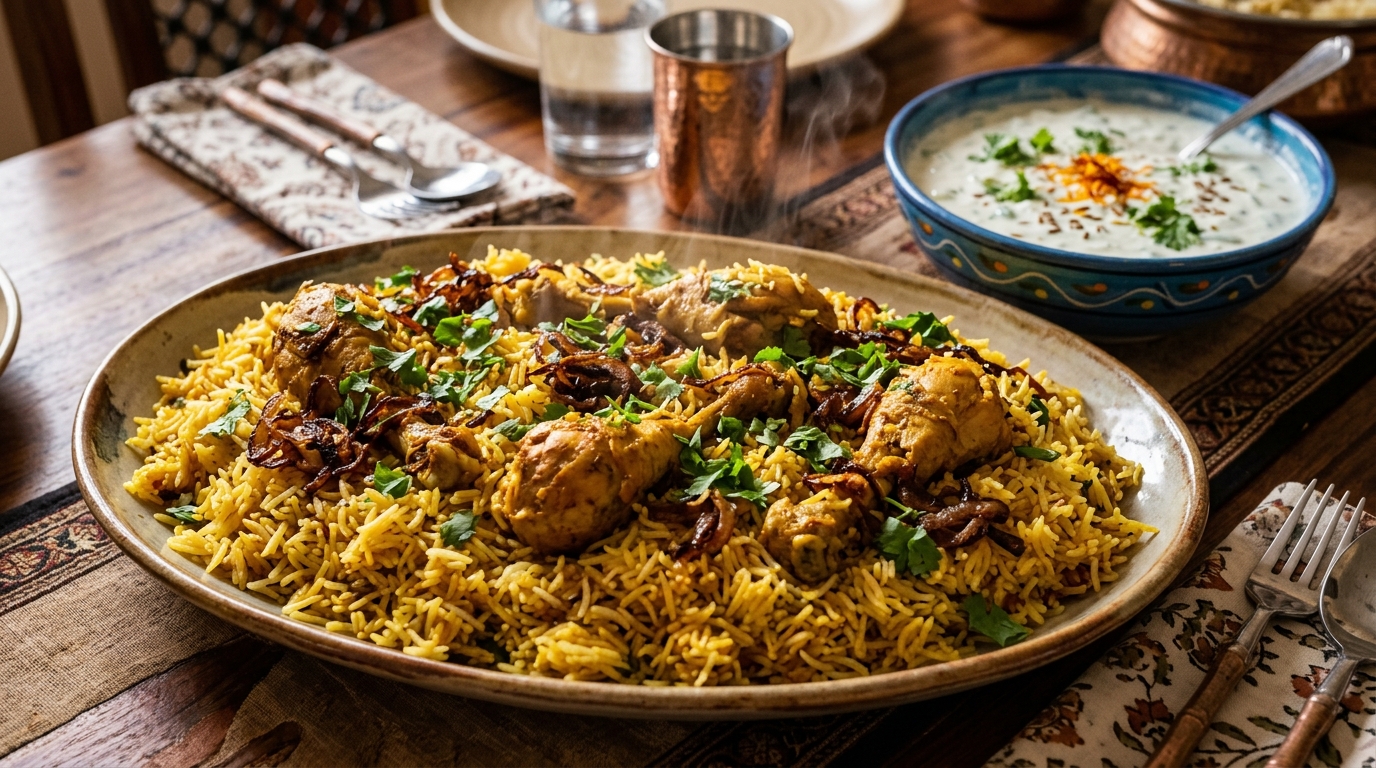
Now comes the moment of truth. Remove the lid carefully. You should see perfectly separated rice grains with yellow and white layers. The aroma will be incredible.
Use a flat spoon or spatula to gently fluff the biryani. Start from the sides, working your way to the center. Serve it on a large platter so everyone can see those beautiful layers.
Vegetarian Variations That Actually Work
Not everyone eats chicken, and that’s totally cool. A vegetable biryani recipe can be just as amazing when done right. I’ve made veg dum biryani recipe dozens of times for my vegetarian friends.
Use mixed vegetables like potatoes, carrots, beans, cauliflower, and peas. Cut them in chunks, not tiny pieces. Paneer works great too for protein.
The process stays the same—marinate the vegetables in yogurt and spices. Cook them partially before layering. The dum technique works identically.
For soya biryani recipe fans, marinate soya chunks after soaking them in hot water. They absorb flavors beautifully. Just squeeze out excess water before marinating.
Common Mistakes to Avoid
Ever wondered why your biryani doesn’t taste like restaurant biryani? Let me tell you what’s probably going wrong. Most people use the wrong rice. Regular rice won’t cut it. Basmati is non-negotiable.
Overcooking the rice is mistake number two. If your rice is mushy before layering, you’ve already lost. Remember—70% cooked max.
Skipping the resting time after cooking ruins everything. That final 5-minute rest is when the magic completes itself. Don’t rush to serve immediately.
Using low-quality spices makes bland biryani. Fresh, good quality spices matter. Old, stale spices won’t give you the punch you need.
Serving Suggestions and Side Dishes
Biryani doesn’t need much company, but the right sides elevate it. Raita is classic—mix yogurt with cucumber, onions, and a pinch of cumin. It cools down the heat perfectly.
A simple kachumber salad works great. Dice tomatoes, cucumbers, and onions. Add lemon juice and salt. Fresh and crunchy.
Shorba (thin curry soup) on the side is traditional. I personally love a squeeze of lime over my biryani. That acidic kick cuts through the richness.
For iftar recipes during Ramadan, biryani is a star player. Serve it with dates and fresh fruit. It’s filling, flavorful, and festive.
Tips for Making It Even Better
Want to level up your game? Here are some pro tips I’ve learned over the years. Toast your whole spices before using them. It releases essential oils and intensifies flavor.
Use aged basmati rice if you can find it. It’s drier and gives longer, more separate grains. Rice that’s been aged for a year or more is ideal.
Add a tablespoon of rose water to your saffron milk. It adds a subtle fragrance that’s amazing. Very traditional Hyderabadi biryani move.
If you’re making this for quick cooking recipes during busy weekdays, prep everything the night before. Marinate chicken, slice onions, soak rice. Next day becomes much easier.
Storing and Reheating
Leftover biryani stores well in the fridge for 3-4 days. Keep it in an airtight container. The flavors actually deepen overnight. Some say it tastes better the next day.
Reheating is tricky though. Microwave makes it dry. The best method is on the stovetop. Sprinkle a little water, cover tight, and heat on low for 5-7 minutes.
You can also freeze biryani for up to a month. Portion it out in freezer-safe containers. Thaw overnight in the fridge before reheating.
For meal prep fans looking for healthy breakfast recipes easy to make ahead, biryani might not be breakfast food. But hey, who says you can’t have biryani for breakfast? I won’t judge 🙂
Why This Recipe Works
The technique here is foolproof because it respects the basics. We’re not taking shortcuts. The rice is properly parboiled. The chicken is marinated well. The layering is done right.
The dum cooking method is what seals the deal. That trapped steam cooks everything evenly while keeping moisture locked in. No dry rice. No undercooked chicken.
This recipe also scales beautifully. Making it for 4 people or 12? Just adjust quantities proportionally. The method stays the same. That’s the beauty of good Indian cooking recipes.
Making It Your Own
Once you’ve mastered the basics, experiment. Add boiled eggs. Try prawns instead of chicken. Mix in some cashews and raisins for sweetness.
Some regions add potato slices. Others use different spice blends. Biryani is versatile like that. It adapts to what you have and what you like.
The core technique remains constant—that’s your foundation. Everything else is customization. Think of it as your canvas for chicken starter recipes that wow people.
Have you ever thought about why biryani brings people together? It’s not just food. It’s an experience. The process. The anticipation. The shared enjoyment.
Final Thoughts
Making biryani at home is easier than you think. Yes, it takes time. Yes, you need to follow steps carefully. But the result is absolutely worth it.
Your house will smell incredible for hours. Your family will think you’re a culinary genius. You’ll feel proud seeing those perfect layers come together.
Start with this recipe. Follow it exactly the first time. Once you understand how it works, then start tweaking. That’s how you develop your signature style.
Remember—good biryani is about patience, quality ingredients, and respect for the process. Rush any step and you’ll taste it. Take your time and you’ll create magic.
Now get in that kitchen and make some biryani. Your future self will thank you. And honestly, what better way to spend an afternoon than creating something this delicious?

Biryani Recipe: The Ultimate Guide to Making Restaurant-Style Biryani at Home
4
servings30
minutes40
minutes300
kcalAuthentic biryani made by layering marinated chicken with partially cooked basmati rice. The dum cooking technique steams everything together, creating aromatic, flavorful rice with tender meat. Ghee, saffron, and fried onions add richness. Perfect for special occasions or weekend cooking projects.
Ingredients
Rice:
2 cups Basmati rice
4 cups water
2 bay leaves
4 green cardamom pods
4 cloves
1 cinnamon stick (2-inch)
1 tablespoon salt
Chicken Marinade:
1 kg chicken pieces
1 cup yogurt
2 tablespoons ginger-garlic paste
1 teaspoon red chili powder
1/2 teaspoon turmeric powder
1 teaspoon garam masala
2 tablespoons lemon juice
Salt to taste
Biryani Layers:
3 large onions (sliced)
4 tablespoons ghee
1/2 cup mint leaves
1/2 cup coriander leaves
4 green chilies (slit)
1/4 cup milk
Pinch of saffron
1/4 teaspoon food color (optional)
Whole Spices:
2 bay leaves
4 green cardamom
4 cloves
1 black cardamom
1-inch cinnamon
1 star anise
Directions
- Wash and soak basmati rice for 30 minutes
- Marinate chicken in yogurt and spices for 30 minutes minimum
- Fry sliced onions in ghee until golden brown and crispy
- Cook marinated chicken with whole spices until 80% done
- Parboil rice with whole spices until 70% cooked
- Layer chicken at pot bottom, then add rice layer
- Top with fried onions, herbs, ghee, and saffron milk
- Cover pot tightly with foil and lid
- Cook on high heat 3-4 minutes, then low heat 30-35 minutes
- Rest covered for 5 minutes before serving
- Gently fluff and serve with raita
Frequently Asked Questions
1. Can I make biryani without a pressure cooker?
Absolutely. This recipe doesn’t use a pressure cooker at all. The traditional dum method on stovetop works perfectly. Just make sure your pot has a heavy bottom and tight-fitting lid.
2. Why is my biryani rice musty or sticky?
You’re probably overcooking the rice during parboiling. It should only be 70% cooked before layering. Also, make sure you’re washing the rice thoroughly to remove excess starch.
3. Can I use brown rice instead of basmati?
Technically yes, but it won’t give you authentic biryani texture. Brown rice takes longer to cook and has a different texture. If you must use it, adjust cooking times accordingly.
4. How do I prevent the bottom from burning?
Use a heavy-bottomed pot. Some people place a tawa or griddle under the pot during dum cooking. Keep the heat on the lowest setting after the initial high heat.
5. What’s the difference between biryani and pulao?
Biryani uses the layering technique and dum cooking. Rice and meat are partially cooked separately, then layered and cooked together. Pulao is a one-pot dish where everything cooks together from the start.